🚨 Problem: Need to create a fiscal calendar in NetSuite but not sure how? 🚨
This tutorial will walk you through the steps to create a fiscal calendar in NetSuite, ensuring your financial setup is accurate and aligned with your accounting periods. 📊✨
Step-by-Step Guide 📋
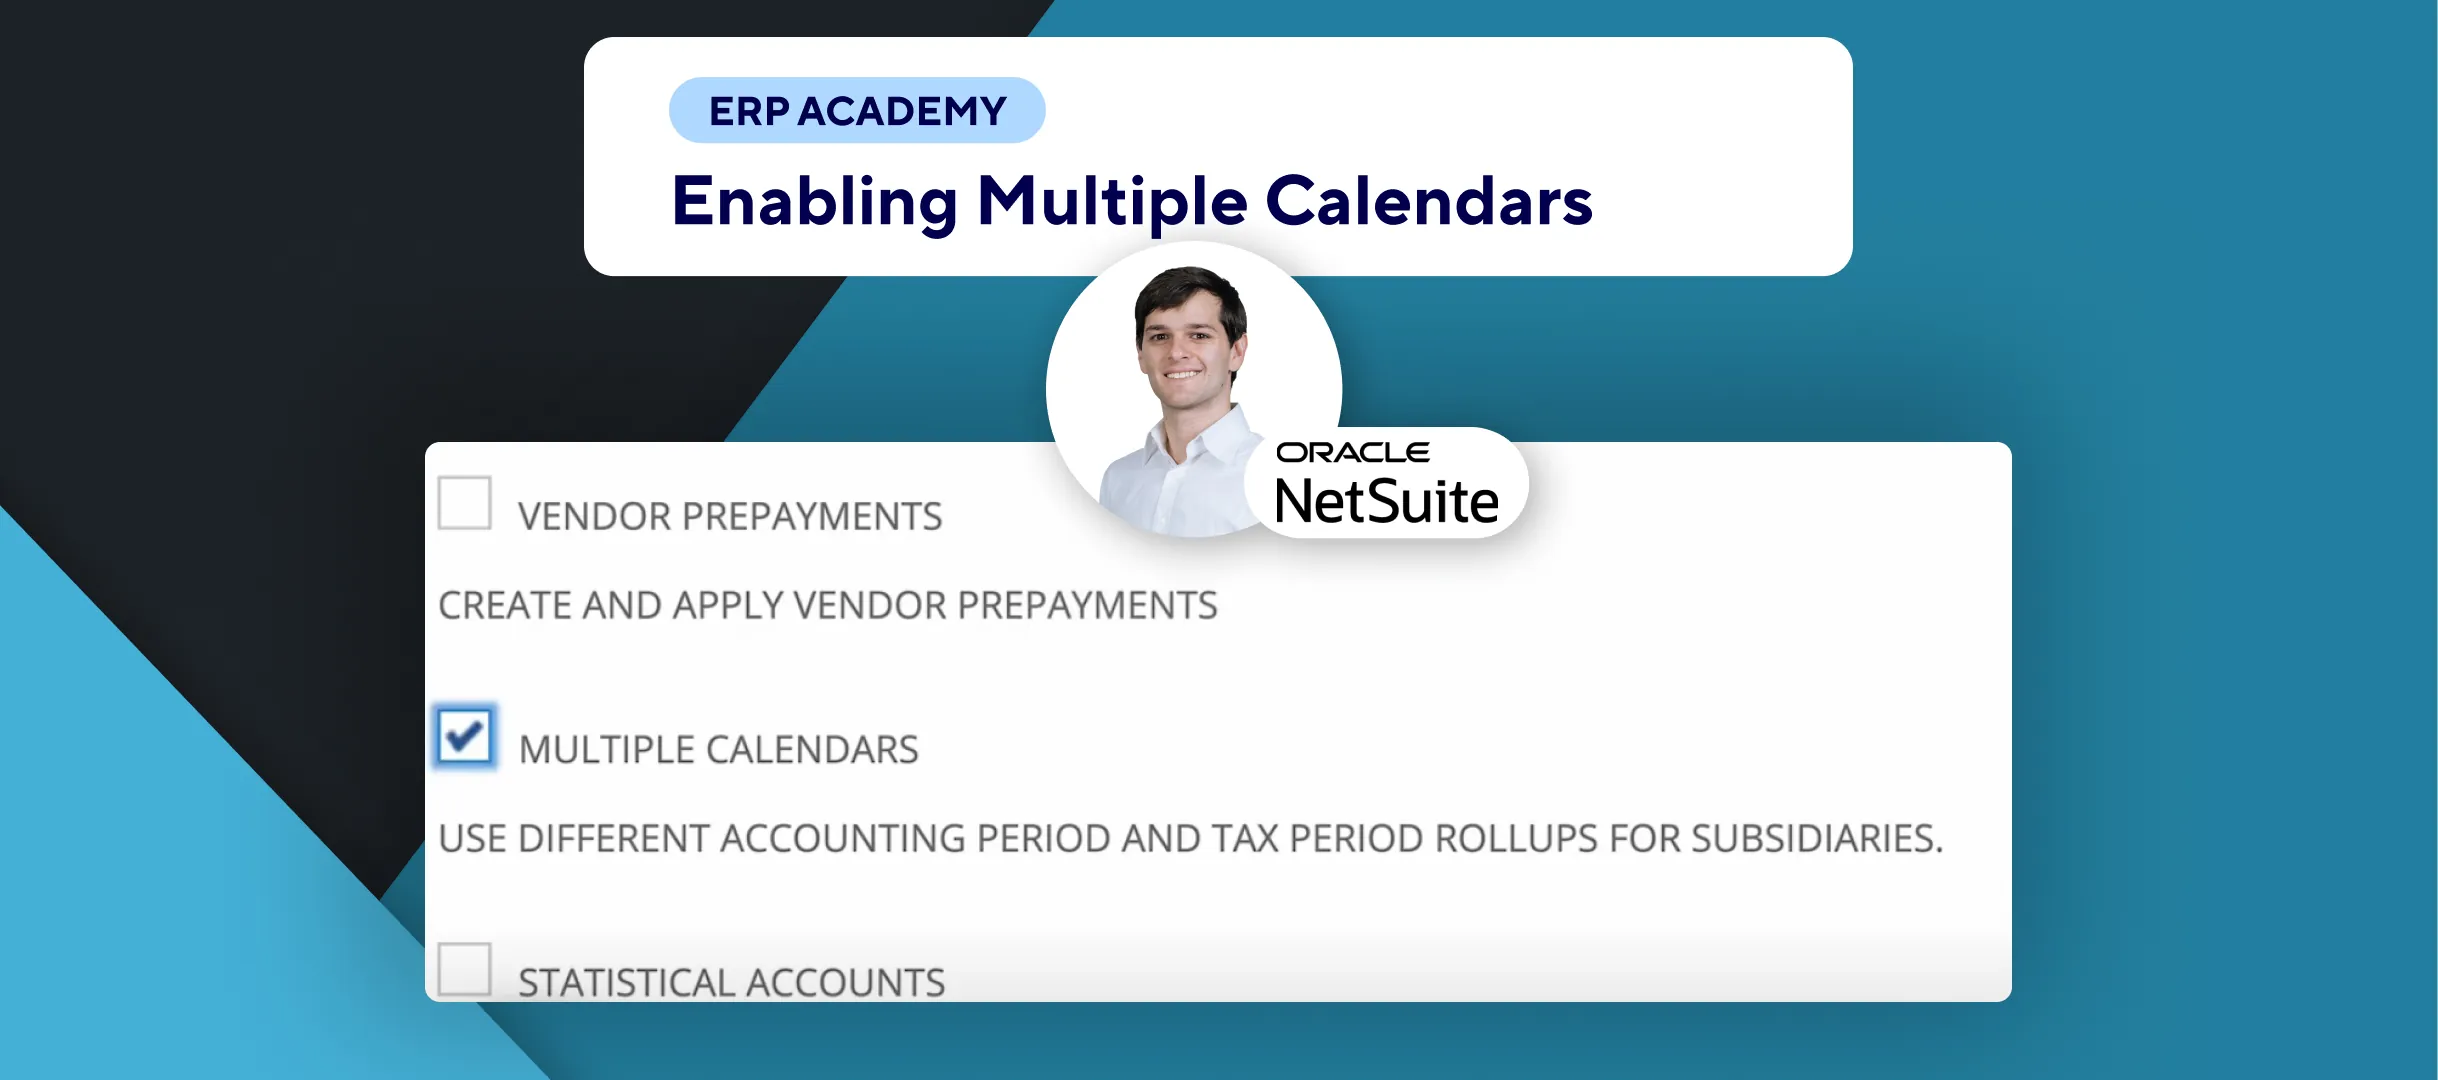
- Ensure Multiple Calendars Feature is Enabled
- Before creating a fiscal calendar, make sure the Multiple Calendars feature is enabled. 🔄🗓️
- If you’re unsure how to do this, check out the previous tutorial on enabling the feature. 🎥✨
- Navigate to Fiscal Calendars
- Go to the main menu: Setup > Accounting > Fiscal Calendars. 🔧📅
- Note: If you don’t see this option, it’s because the Multiple Calendars feature isn’t enabled yet. ⚠️
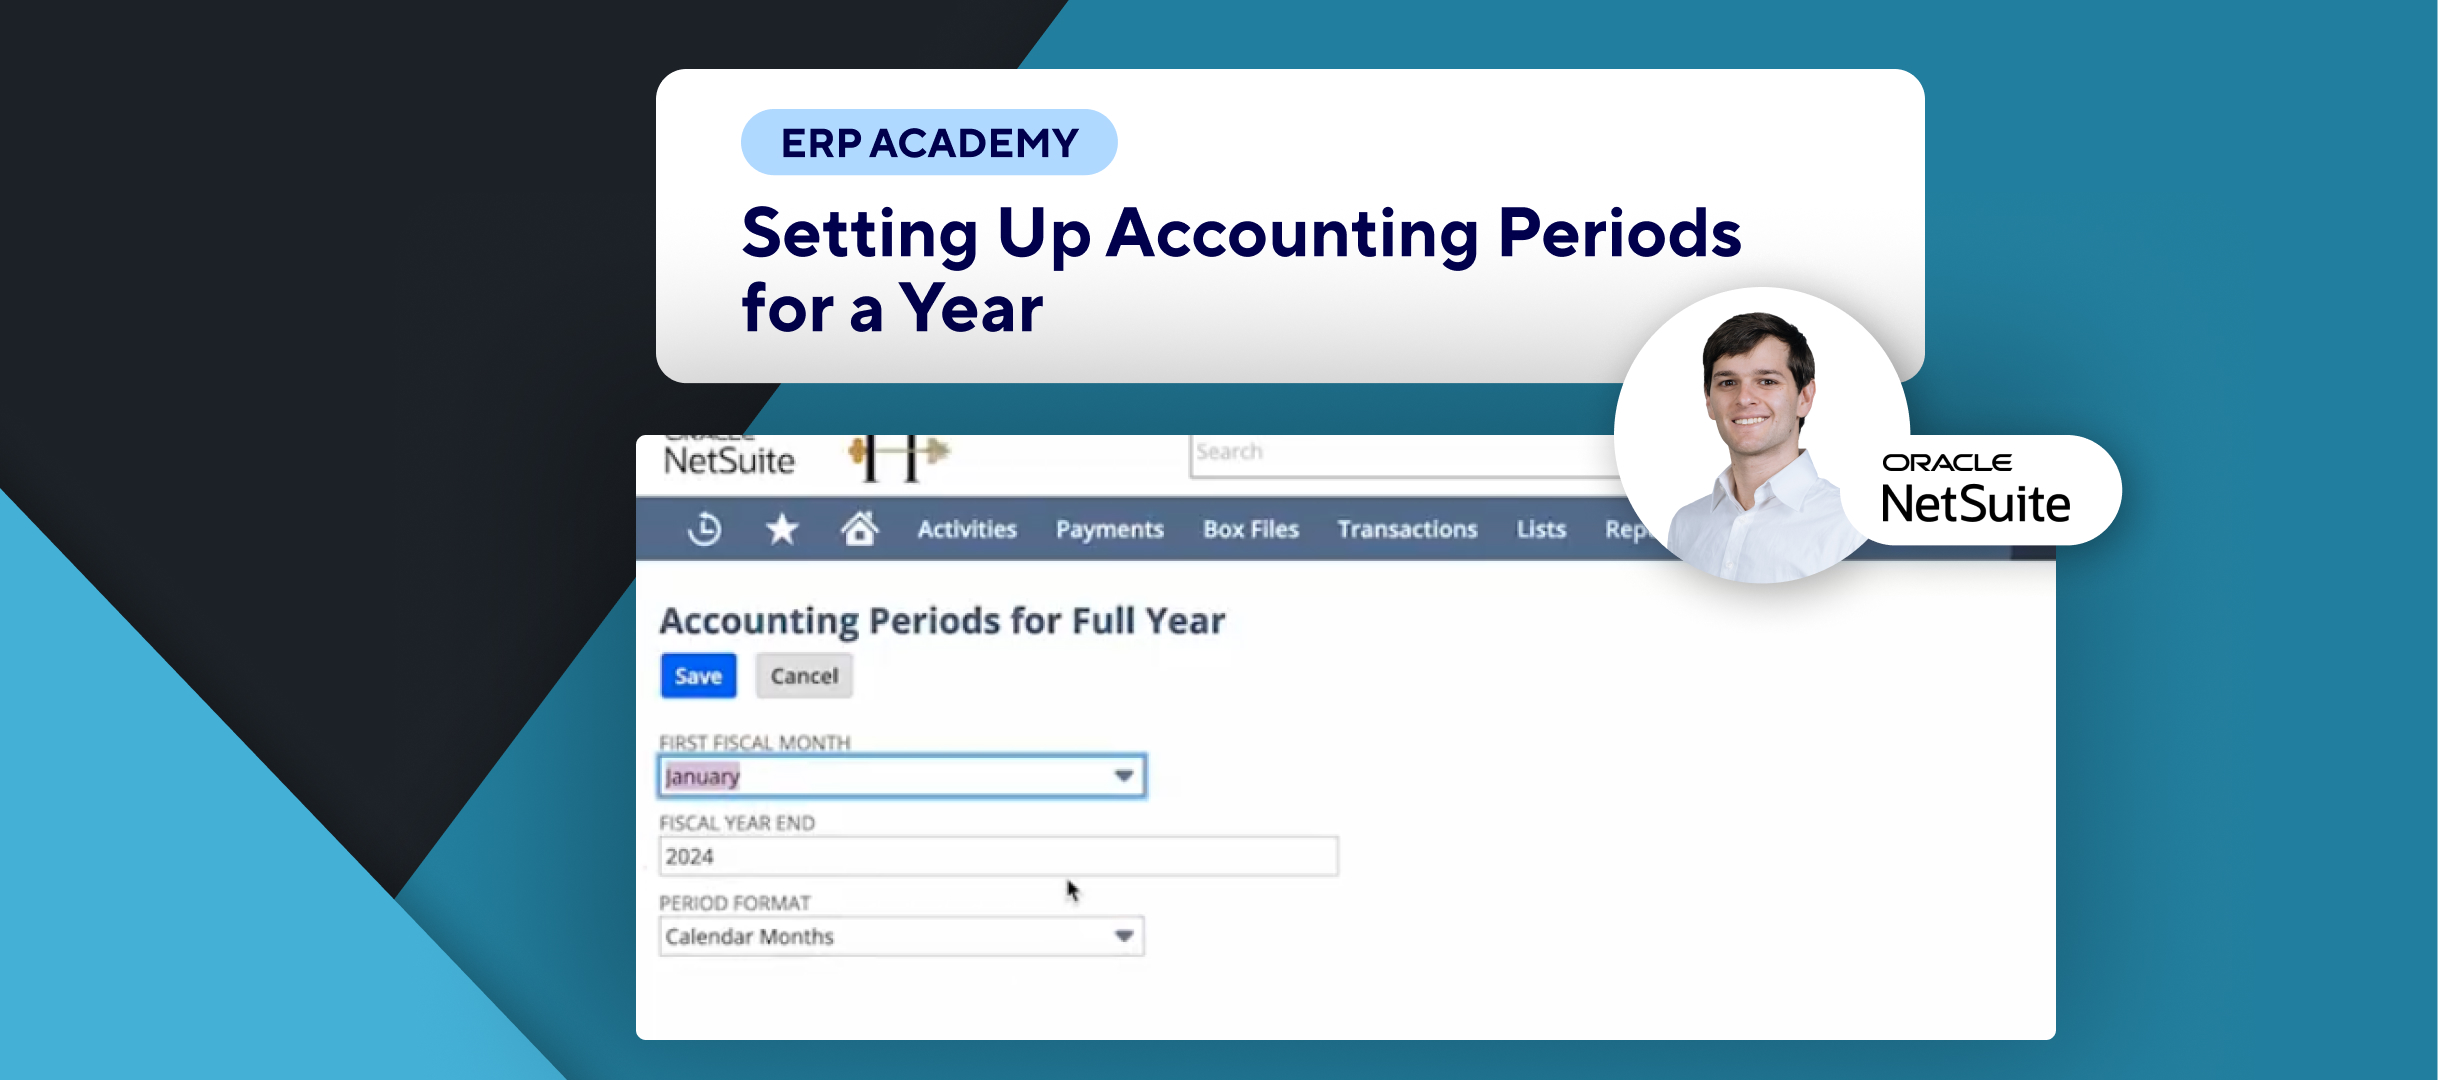
- Create a New Fiscal Calendar
- Click on New Fiscal Calendar to start the process. 🆕📅
- Enter Calendar Details
- Provide a name for the calendar, e.g., Demo Fiscal Calendar. ✏️
- In the First Fiscal Month field, enter the month when your fiscal year starts. 📅
- Check the box for Default Fiscal Calendar if you want to assign this calendar to new subsidiaries. ✅🏢
- Save Your Calendar
- After entering all necessary details, click Save to finalize your new fiscal calendar. 💾✔️
Congratulations! 🎊 You’ve successfully created a fiscal calendar in NetSuite! 🌟🎉
If you found this tutorial helpful, please subscribe to this channel for more tips and tutorials. Visit www.KOLLENO.com for more tools to enhance your accounting processes! 🎥✨💼